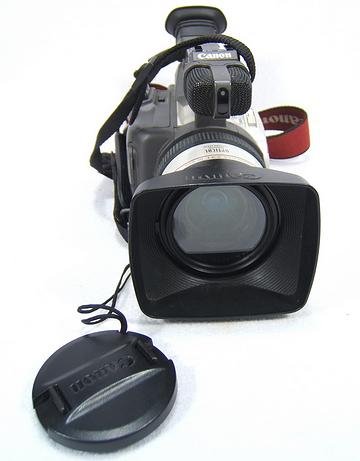
 Next I turned to the camera which would be the primary tool with which I would capture the experiences I was to have and share them with my students. The video camera I had was a present given to me by a combined effort of my immediately family six years earlier when I graduated from college. I had dragged it on a number of adventures already, and had some experience with its pros and cons. For its time, it has outstanding picture quality in a number of conditions, but it is big and heavy.
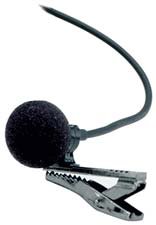 It is equipped with an external microphone, however anything that it picks up which is not directly in its field or closer than a few feet can end up sounding muddled. Since I intended to conduct interviews it would be necessary to have a microphone that could be brought closer to the source of the sound. Professionals record audio onto a separate device and splice it in when they are editing, but since I had to carry it all on my back I was looking for a solution that would record directly onto the camera’s tape. I decided to purchase an inexpensive lavalier microphone that could be clipped onto a person’s shirt, and had a thin 12 foot cord running back to the camera. I figured that this type of mic was small enough to fit in my pack and could also be positioned to reduce background noise if necessary.
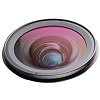 Next I looked into the use of different lens adapters. I went back to the camera store and experimented with the few that fit my camera. The lens that I believed would be most effective for what I was doing was a fisheye lens. A fisheye lens uses a series of concave lenses to bend the image in view. I found that with the fisheye I had a much wider field of view, which would be useful for capturing landscapes and larger scenes. It also created a sense of depth as the peripheral portions of the footage appeared to curve and move more quickly from the field of view as the camera moved towards a subject.
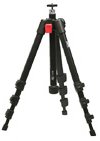 Then I considered a tripod. As it turns out a surprising amount of what separates the professional look of most film from the amateur look of home video, is the vantage point of the camera. The position of the camera determines the window into the scene that the viewer will experience. If that window is jerky or it seems like the camera man is trying to chase the subject around to keep it in the scene, it tends to annoy the viewer and detract from their ability to enjoy the footage. Having a tripod is a good start and is fine for still footage; however, as I found out when I experimented with an old tripod that I had, the real difference is in the head. A normal friction head, like the one that is used on many tripods for still cameras, will produce irregular choppy movement when used with a video camera. The smooth look that professional footage has is normally achieved through the use of a fluid head. A fluid head uses a viscous oil between the mechanical components and creates a smooth movement with clean starts and stops, as well as jerk-free pans. As I read into it and experimented with different things I realized that I was going to have buy I fluid head and a new tripod.
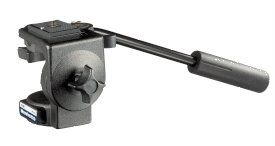 These are not typically designed with my style of travel in mind. Finding sticks (tripod legs) that would fit a fluid head, were a size and weight that I could carry, and were not made of some astronomically expensive carbon fibre material, was not easy. The solution I finally found was a used tripod in a camera store in a neighboring town that had a ball head that could lock. I found that I could mount a fluid head on top of that, and as long as I was careful about keeping the fluid head screwed on tightly it would give pretty smooth results. It was hoaky but it worked.
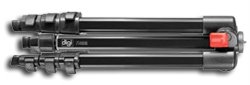
Even with the head attached it folded up to about 16 inches and with some nylon straps I bought at an outdoors store I was able to lash it down to my pack above the case for my camera. I then covered them with a nylon stuff sack to prevent scratches and damage.
No comments:
Post a Comment